Let’s be honest here—we’ve all been there. You’re enjoying a peaceful night, and suddenly, you hear that annoying drip-drip-drip from your bathtub faucet. Ugh, right? A leaking bathtub faucet isn’t just an irritation; it can waste gallons of water and even cause damage to your home if left unchecked. But don’t sweat it, my friend! Fixing a leaky bathtub faucet isn’t as scary as it sounds, and with the right steps, you can tackle this problem like a pro.
Now, before you call in the plumber and shell out big bucks, take a moment to understand what’s causing the leak. A dripping faucet is often a simple issue that can be fixed with some basic tools and a bit of patience. In this guide, we’ll walk you through everything you need to know about how to fix a leaking bathtub faucet, step by step. So, grab your toolkit, and let’s get started!
Remember, fixing a leaky faucet isn’t just about saving money—it’s also about being environmentally responsible. Every drop counts, and addressing leaks promptly can make a huge difference for both your wallet and the planet. Let’s dive into the details!
Read also:Loni Willison Net Worth 2024 Update Amp Facts
Understanding the Problem: Why Does Your Bathtub Faucet Leak?
Before we jump into the solutions, it’s essential to understand why your bathtub faucet might be leaking in the first place. While there are several potential causes, the most common ones include worn-out washers, corroded valve seats, or loose connections. Here’s a quick rundown of the usual culprits:
- Worn-out washers: These tiny rubber or plastic components are crucial for sealing the faucet. Over time, they can wear out or crack, leading to leaks.
- Corroded valve seats: The valve seat is the part of the faucet where the water flow is controlled. If it gets corroded or damaged, it can cause leaks.
- Loose connections: Sometimes, the issue isn’t with the internal parts but with the external connections. A loose pipe or fitting can also lead to leaks.
By identifying the root cause, you’ll be better equipped to fix the problem efficiently. Let’s explore each of these issues in more detail below.
Gather Your Tools: What You’ll Need to Fix a Leaking Bathtub Faucet
Fixing a leaking bathtub faucet doesn’t require an entire toolkit, but there are a few essential items you’ll need to get the job done. Here’s a list of tools and materials that will come in handy:
- Adjustable wrench
- Plumber’s tape
- Screwdriver (Phillips or flathead, depending on your faucet)
- Replacement washers or O-rings
- Silicone grease
- Bucket or towel to catch water
Having these tools on hand will make the process smoother and faster. If you’re missing any of these items, it’s worth investing in them, as they’ll come in handy for future plumbing projects too.
Step-by-Step Guide: How to Fix a Leaking Bathtub Faucet
Now that you’ve got your tools ready, let’s dive into the step-by-step process of fixing a leaking bathtub faucet. Follow these instructions carefully, and you’ll have your faucet leak-free in no time.
Step 1: Turn Off the Water Supply
The first and most important step is to turn off the water supply to your bathtub faucet. This will prevent water from flowing while you work, ensuring safety and minimizing mess. Look for the shut-off valves under the sink or near the bathtub—if you can’t find them, you may need to turn off the main water supply to your home.
Read also:Top Fikfap Resources Trends
Step 2: Remove the Faucet Handle
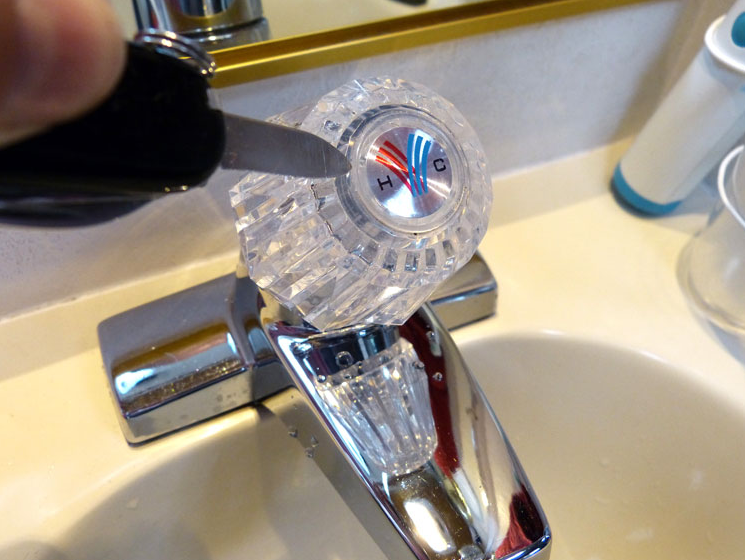
Most bathtub faucets have a decorative cap on the handle that hides the screw. Use a flathead screwdriver to gently pry off the cap, then unscrew the handle using the appropriate screwdriver. Once the handle is removed, you’ll have access to the internal components.
Step 3: Inspect and Replace the Washer
Inside the faucet, you’ll find a washer attached to a stem. Remove the stem by unscrewing it with an adjustable wrench, and inspect the washer for signs of wear or damage. If it’s worn out, replace it with a new one that matches the size and type. Apply a small amount of silicone grease to the new washer to ensure a tight seal.
Step 4: Check the O-Ring and Valve Seat
While you’re inside the faucet, take a moment to check the O-ring and valve seat for corrosion or damage. If either of these components is faulty, replace them with new ones. A corroded valve seat can be repaired using a valve seat wrench, which is a specialized tool available at most hardware stores.
Step 5: Reassemble the Faucet
Once you’ve replaced the necessary parts, it’s time to reassemble the faucet. Screw the stem back into place, reattach the handle, and replace the decorative cap. Double-check all connections to ensure they’re tight and secure.
Step 6: Test the Faucet
Turn the water supply back on and test the faucet to ensure the leak has been fixed. If the dripping has stopped, congratulations—you’ve successfully fixed your leaking bathtub faucet! If the leak persists, you may need to investigate further or consult a professional plumber.
Common Mistakes to Avoid When Fixing a Leaking Bathtub Faucet
Even with the best intentions, mistakes can happen when tackling DIY plumbing projects. Here are a few common pitfalls to avoid:
- Not turning off the water supply: This is a rookie mistake that can lead to a big mess. Always shut off the water before starting any work.
- Using the wrong replacement parts: Make sure you’re using washers, O-rings, and other components that match the size and type of your faucet.
- Over-tightening connections: While it’s important to ensure connections are secure, over-tightening can cause damage or leaks.
By avoiding these mistakes, you’ll increase your chances of a successful repair and save yourself from unnecessary frustration.
Tips for Preventing Future Leaks
Fixing a leaking bathtub faucet is one thing, but preventing future leaks is equally important. Here are a few tips to keep your faucet in top condition:
- Regular maintenance: Periodically check your faucet for signs of wear or damage and replace parts as needed.
- Avoid excessive force: Be gentle when turning the faucet on and off to prevent unnecessary strain on the components.
- Use plumber’s tape: Applying plumber’s tape to threaded connections can help create a tighter seal and prevent leaks.
By following these tips, you’ll reduce the likelihood of future leaks and extend the lifespan of your bathtub faucet.
When to Call a Professional Plumber
While many faucet leaks can be fixed with basic DIY skills, there are situations where it’s best to call in a professional plumber. If you’ve tried all the steps outlined above and the leak persists, or if the issue seems more complex than a simple repair, it may be time to seek expert help. A professional plumber can diagnose and fix even the trickiest plumbing problems, ensuring your home remains leak-free.
Cost Considerations: How Much Does It Cost to Fix a Leaking Bathtub Faucet?
Fixing a leaking bathtub faucet can save you a significant amount of money in the long run. According to recent data, a single dripping faucet can waste up to 3,000 gallons of water per year, which can add up on your water bill. The cost of replacement parts, such as washers and O-rings, is typically quite low, ranging from $2 to $10. If you need to hire a plumber, expect to pay anywhere from $100 to $300, depending on the complexity of the job and your location.
Conclusion: Take Action and Fix That Leaky Faucet Today!
In summary, fixing a leaking bathtub faucet is a straightforward task that can be accomplished with the right tools and a bit of patience. By following the steps outlined in this guide, you can save money, conserve water, and prevent potential damage to your home. Remember to identify the root cause of the leak, gather your tools, and take the necessary precautions to ensure a successful repair.
Now that you’ve learned how to fix a leaking bathtub faucet, it’s time to take action! Don’t let that annoying drip-drip-drip keep you up at night. Get your toolkit ready, and tackle the problem head-on. And if you found this guide helpful, don’t forget to share it with your friends and family. Together, we can all become DIY plumbing pros!
Table of Contents
- Understanding the Problem: Why Does Your Bathtub Faucet Leak?
- Gather Your Tools: What You’ll Need to Fix a Leaking Bathtub Faucet
- Step-by-Step Guide: How to Fix a Leaking Bathtub Faucet
- Step 1: Turn Off the Water Supply
- Step 2: Remove the Faucet Handle
- Step 3: Inspect and Replace the Washer
- Step 4: Check the O-Ring and Valve Seat
- Step 5: Reassemble the Faucet
- Step 6: Test the Faucet
- Common Mistakes to Avoid When Fixing a Leaking Bathtub Faucet
- Tips for Preventing Future Leaks
- When to Call a Professional Plumber
- Cost Considerations: How Much Does It Cost to Fix a Leaking Bathtub Faucet?