**So, let’s face it—nobody wakes up excited about a roof leak. It’s one of those pesky problems that can sneak up on you when you least expect it. Whether it’s a tiny drip or a full-blown waterfall, a leaking roof can turn your home into a disaster zone in no time. But hey, don’t panic just yet! Roof leak repair doesn’t have to be this overwhelming monster that keeps you up at night. With the right knowledge and tools, you can tackle this issue head-on and get your roof back in shape.**
Now, before we dive deep into the world of roof leak repair, let’s address the elephant in the room: why does this even matter? Well, a leaking roof isn’t just an eyesore—it’s a potential threat to your home’s structural integrity. Water damage can lead to mold growth, weakened roof framing, and even electrical hazards. And if you’re thinking, “I’ll deal with it later,” think again. Ignoring a small leak today could cost you big bucks tomorrow.
That’s where this guide comes in. We’re here to break down everything you need to know about roof leak repair, from identifying the problem to fixing it like a pro. Whether you’re a DIY enthusiast or just someone looking for a reliable solution, we’ve got your back. So, grab a cup of coffee (or tea, no judgment), and let’s get started!
Read also:Best Hindi Movies On Moviesflix
Table of Contents:
- Understanding Roof Leaks
- Common Causes of Roof Leaks
- Diagnosing the Leak
- Tools and Materials You’ll Need
- Step-by-Step Roof Leak Repair Process
- Preventing Future Roof Leaks
- Cost of Roof Leak Repair
- When to Call a Professional
- Pro Tips for Roof Leak Repair
- Conclusion
Understanding Roof Leaks
Let’s kick things off by talking about what exactly a roof leak is. Simply put, a roof leak happens when water finds its way into your home through the roof. It can be caused by a variety of factors, from damaged shingles to improper installation. And trust me, leaks don’t discriminate—they can happen to any type of roof, whether it’s asphalt, metal, or tile.
But why should you care? Well, aside from the obvious inconvenience, roof leaks can lead to serious issues if left unchecked. Mold, mildew, and rot are just a few of the nasty surprises that can pop up if water is allowed to sit in your home for too long. Not to mention, leaks can compromise the structural integrity of your roof, making it less effective at protecting you and your family.
Types of Roof Leaks
Not all roof leaks are created equal. Some are small and manageable, while others can be downright catastrophic. Here are a few common types of roof leaks you might encounter:
- Shingle Leaks: Damaged or missing shingles can create gaps that allow water to seep in.
- Flashing Leaks: Flashing is the metal strips that seal joints around chimneys, vents, and skylights. If these strips are damaged or improperly installed, leaks can occur.
- Valley Leaks: Roof valleys are the areas where two roof planes meet. These areas are prone to leaks if the roofing material is worn or improperly installed.
Common Causes of Roof Leaks
Now that we know what roof leaks are, let’s talk about why they happen. Understanding the root cause of a leak is crucial to preventing it from happening again. Here are some of the most common causes of roof leaks:
- Aging Roofing Materials: Over time, roofing materials like shingles and flashing can deteriorate, making them more susceptible to leaks.
- Poor Installation: If your roof wasn’t installed correctly in the first place, it’s only a matter of time before leaks start showing up.
- Extreme Weather: Harsh weather conditions like heavy rain, hail, and snow can damage your roof and cause leaks.
Weather-Related Damage
Let’s talk about one of the biggest culprits of roof leaks: the weather. Storms, high winds, and even sunlight can wreak havoc on your roof. For instance, hail can crack shingles, while strong winds can lift them, creating gaps for water to enter. And don’t forget about ice dams—those pesky formations that block water from draining properly, forcing it back into your home.
Read also:T33n Leak Latest Details Impact
Diagnosing the Leak
So, you’ve noticed a leak in your roof. Now what? The first step is to diagnose the problem. This might sound intimidating, but with a little detective work, you can pinpoint the source of the leak. Here’s how:
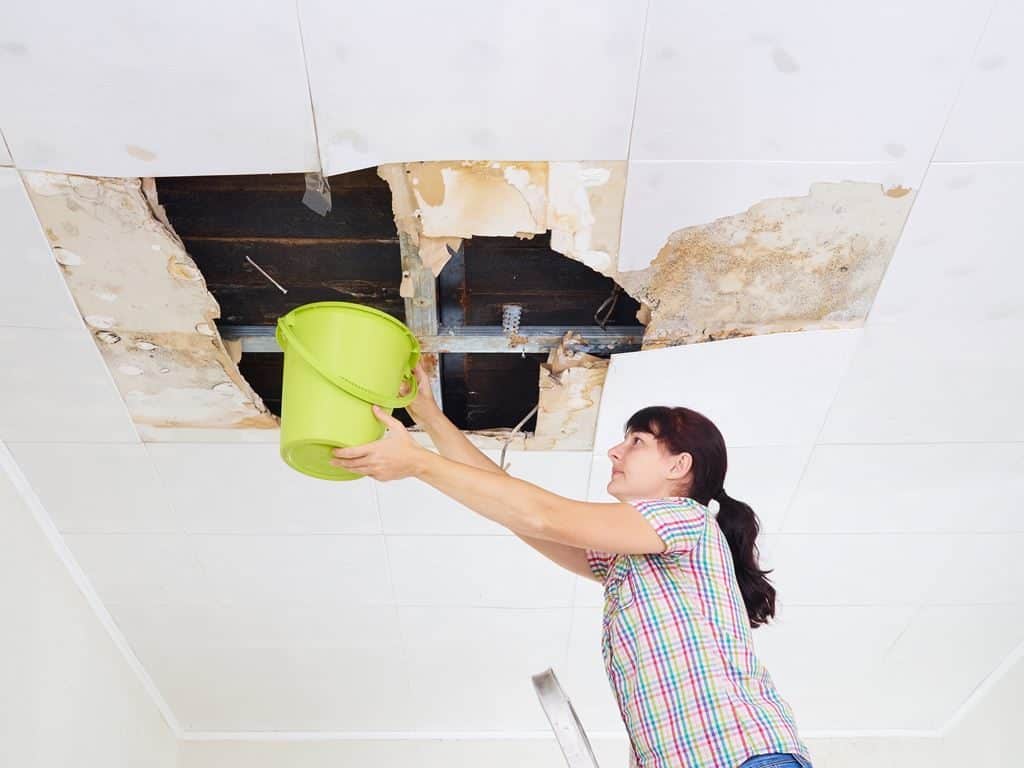
Start by inspecting your attic. Look for water stains, damp spots, or mold growth on the ceiling or walls. These are telltale signs of a roof leak. Once you’ve located the area, trace the water back to its source. Keep in mind that leaks don’t always appear directly below the source, so you might need to do a bit of sleuthing.
Common Leak Locations
Here are some common areas where roof leaks tend to occur:
- Chimneys: The area around your chimney is a prime spot for leaks, especially if the flashing is damaged.
- Vents: Roof vents can also be a source of leaks if the seals around them are worn or cracked.
- Skylights: Improperly sealed skylights are another common culprit of roof leaks.
Tools and Materials You’ll Need
Now that you’ve identified the source of the leak, it’s time to gather your tools and materials. Here’s a list of essentials you’ll need for roof leak repair:
- Ladder: A sturdy ladder is a must for accessing your roof safely.
- Tarps: Use tarps to cover the damaged area temporarily until you can make permanent repairs.
- Roofing Cement: This is great for sealing small leaks and gaps.
- Replacement Shingles: If your shingles are damaged, you’ll need to replace them.
Safety First
Before you climb up there, remember to prioritize safety. Wear non-slip shoes, use a harness if necessary, and never work on a wet or icy roof. It’s also a good idea to have a buddy around in case something goes wrong.
Step-by-Step Roof Leak Repair Process
Alright, let’s get down to business. Here’s a step-by-step guide to repairing a roof leak:
Step 1: Protect the area. Lay down tarps to prevent further water damage while you work.
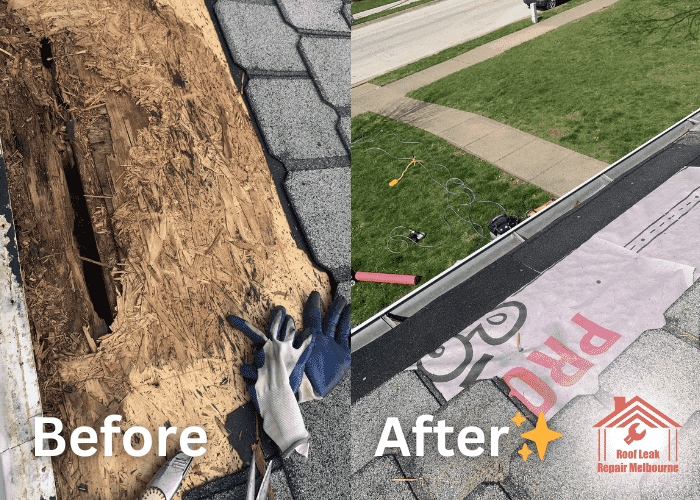
Step 2: Remove any damaged materials. This includes broken shingles, damaged flashing, and any debris that might be clogging gutters or valleys.
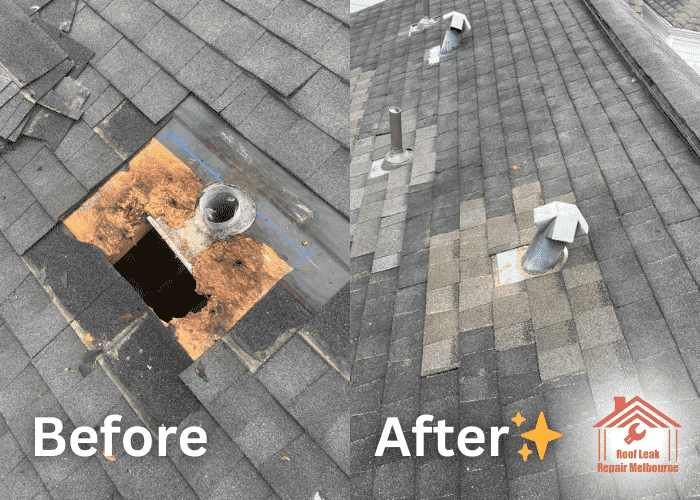
Step 3: Apply roofing cement. Use this to seal any gaps or cracks you find around vents, chimneys, and other potential leak sources.
Step 4: Replace damaged shingles. If your shingles are beyond repair, replace them with new ones that match the existing ones.
DIY vs. Professional Repair
While some roof leaks can be fixed by a handy homeowner, others might require professional help. If the leak is extensive or if you’re not comfortable working on a roof, it’s always a good idea to call in the experts.
Preventing Future Roof Leaks
Once you’ve fixed the leak, it’s time to think about prevention. Regular maintenance is key to keeping your roof in top shape. Here are a few tips to help you avoid future leaks:
- Inspect Your Roof Regularly: At least once a year, give your roof a thorough inspection for signs of wear and tear.
- Clear Gutters and Downspouts: Clogged gutters can cause water to back up and seep into your roof.
- Trim Overhanging Trees: Branches that hang over your roof can scratch shingles and cause damage.
Seasonal Maintenance
Don’t forget to adjust your maintenance routine based on the season. For example, in the fall, make sure to remove leaves and debris from your roof. In the winter, keep an eye out for ice dams and remove them promptly to prevent leaks.
Cost of Roof Leak Repair
Let’s talk money. How much does roof leak repair cost? Well, it depends on the severity of the leak and the materials needed for the repair. On average, you can expect to pay anywhere from $200 to $1,500 for a typical roof leak repair. If the damage is extensive, the cost could climb even higher.
Factors Affecting Cost
Here are some factors that can affect the cost of roof leak repair:
- Size of the Leak: Larger leaks will obviously cost more to repair.
- Materials Needed: The type of materials required for the repair can also impact the cost.
- Professional Labor: If you hire a professional, labor costs will add to the total.
When to Call a Professional
While some roof leaks can be fixed by a DIY enthusiast, others might require the expertise of a professional roofer. Here are a few signs that it’s time to call in the pros:
- Extensive Damage: If the leak is widespread or if there’s significant structural damage, it’s best to leave it to the experts.
- Complex Repairs: If the repair involves replacing large sections of the roof or working with specialized materials, a professional is your best bet.
- Safety Concerns: If you’re not comfortable working on a roof, don’t risk it. Call a professional instead.
Choosing the Right Roofer
When it comes to hiring a roofer, do your research. Look for a licensed and insured professional with a good reputation. Check reviews, ask for references, and get multiple quotes before making a decision.
Pro Tips for Roof Leak Repair
Here are a few pro tips to help you with your roof leak repair:
- Work from the Top Down: Always start your repair at the highest point of the leak and work your way down.
- Use Quality Materials: Don’t skimp on materials. Investing in high-quality roofing products can save you money in the long run.
- Document the Process: Take photos of the damage and the repair process. This can be helpful if you need to file an insurance claim.
Conclusion
Roof leak repair might seem daunting, but with the right approach, it’s definitely manageable. By understanding the causes of leaks, diagnosing the problem, and following a step-by-step repair process, you can protect your home from water damage and keep your roof in great shape. Remember, prevention is key, so don’t forget to maintain your roof regularly to avoid future leaks.
And if you’re ever in doubt, don’t hesitate to call in the professionals. Your safety and peace of mind are worth it. So, what are you waiting for? Go ahead and tackle that leaky roof like a pro!
Before you go, why not leave a comment or share this article with a friend who might find it useful? And if you’re looking for more home improvement tips, check out our other articles. Happy repairing!