**So, you're dealing with a leaking bathtub faucet, huh? It's one of those pesky little problems that can drive anyone up the wall. You know the drill: that incessant drip-drip-drip in the middle of the night when you're trying to sleep. Annoying, right? But here's the good news—you don’t have to call a plumber just yet. With the right tools, a bit of patience, and this guide, you can fix it yourself. Let’s dive into how to fix a leaking bathtub faucet without breaking the bank.**
Leaking faucets aren’t just annoying; they can also waste a ton of water over time. According to the Environmental Protection Agency (EPA), a single dripping faucet can waste up to 3,000 gallons of water per year. That’s a lot of wasted H2O! Plus, if you're on a water meter, that’s extra cash going down the drain—literally.
Don’t worry if you're not a handyman extraordinaire. Fixing a leaking bathtub faucet is simpler than you might think. In this guide, we’ll walk you through every step of the process, from diagnosing the problem to completing the repair. By the end, you'll be a faucet-fixing pro, saving both water and money. Ready to get your hands a little wet? Let’s go!
Read also:Top Hdbub4u Deals Amp Promotions
Table of Contents
- Understanding the Problem: Why Do Bathtub Faucets Leak?
- Tools and Materials You’ll Need
- How to Diagnose the Leak
- Step-by-Step Guide to Fixing a Leaking Bathtub Faucet
- Common Causes of Faucet Leaks
- Regular Maintenance Tips
- Cost Breakdown: DIY vs. Hiring a Plumber
- Preventing Future Leaks
- Troubleshooting Tips
- Final Thoughts: Are You Ready to Fix That Drip?
Understanding the Problem: Why Do Bathtub Faucets Leak?
Before we jump into the nitty-gritty of fixing a leaking bathtub faucet, let’s first understand why faucets leak in the first place. A leaking faucet is often a sign of wear and tear, but it can also be caused by improper installation or damaged parts. Here are some common culprits:
- Worn-out washers or seals
- Corroded valve seats
- Loose or damaged O-rings
- Mineral deposits from hard water
- Cracked faucet body
Read also:Shocking Yololary Leak Details Revealed
Once you know the root cause, fixing the issue becomes much easier. But hey, don’t worry if you’re still scratching your head. We’ll break it down step by step so you can tackle the problem head-on.
Tools and Materials You’ll Need
Fixing a leaking bathtub faucet doesn’t require a ton of fancy equipment. In fact, most of the tools you’ll need are probably already lying around your house. Here’s a quick list to get you started:
Tools:
- Adjustable wrench
- Phillips and flathead screwdrivers
- Pliers
- Allen wrench (if your faucet requires it)
- Needle-nose pliers
Materials:
- Replacement washers or O-rings (depending on your faucet type)
- Silicone grease
- Vinegar or descaling solution (for mineral deposits)
- Teflon tape
Having these tools and materials on hand will make the job much smoother. Trust me, you don’t want to be halfway through the repair only to realize you’re missing something crucial.
How to Diagnose the Leak
Diagnosing the source of the leak is key to fixing it effectively. Here’s how you can pinpoint the problem:
1. Turn off the water supply: This is super important! You don’t want to be working with running water while you’re fixing the faucet. Look for the shut-off valve under the sink or near the main water supply.
2. Inspect the faucet: Take a close look at the faucet handle, spout, and base. Is the water leaking from the handle, the base, or the spout? This will give you a clue as to where the problem lies.
3. Check for mineral deposits: If you live in an area with hard water, mineral deposits could be causing the leak. Look for white, chalky buildup around the faucet.
4. Test the washer and O-ring: Remove the faucet handle and check the condition of the washer and O-ring. If they’re worn out or damaged, that’s likely the culprit.
By following these steps, you’ll be able to identify the exact cause of the leak and take the appropriate action to fix it.
Step-by-Step Guide to Fixing a Leaking Bathtub Faucet
Now that you’ve diagnosed the problem, it’s time to roll up your sleeves and get to work. Here’s a step-by-step guide to fixing your leaking bathtub faucet:
Step 1: Turn Off the Water Supply
Before you do anything else, make sure the water supply is turned off. This will prevent water from gushing out while you’re working.
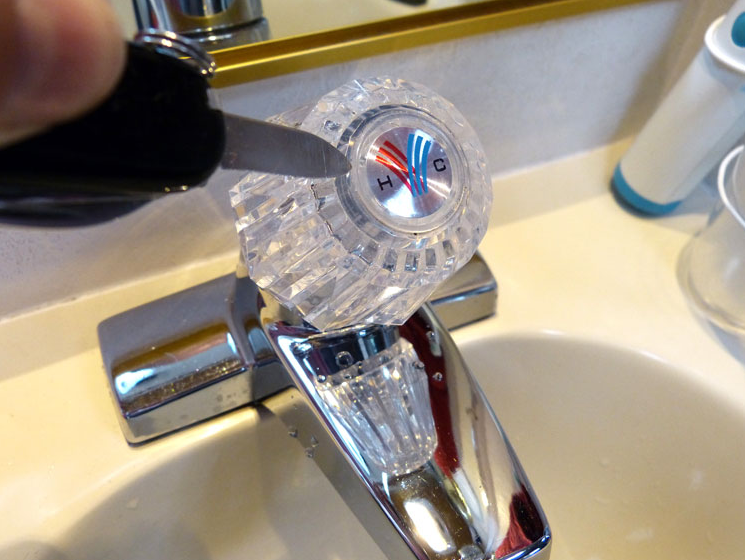
Step 2: Remove the Faucet Handle
Use a screwdriver or Allen wrench to remove the handle. If there’s a decorative cap on the handle, gently pry it off with a flathead screwdriver to reveal the screw underneath.
Step 3: Inspect and Replace the Washer
Once the handle is off, you’ll see the stem of the faucet. Unscrew the stem and check the washer at the end. If it’s worn out, replace it with a new one. Apply a bit of silicone grease to the new washer before reassembling the faucet.
Step 4: Check the O-Ring
If the washer isn’t the issue, check the O-ring. If it’s damaged or brittle, replace it with a new one. Again, apply silicone grease to the new O-ring for a snug fit.
Step 5: Clean Mineral Deposits
If mineral deposits are the problem, soak the faucet parts in vinegar or use a descaling solution to remove the buildup. You can also use a toothbrush to scrub away stubborn deposits.
Step 6: Reassemble the Faucet
Once you’ve replaced the necessary parts and cleaned everything, reassemble the faucet in reverse order. Tighten all screws and connections securely, but be careful not to overtighten them.
Step 7: Test the Faucet
Turn the water supply back on and test the faucet. If the leak is gone, congrats—you’ve successfully fixed the problem! If the leak persists, you may need to investigate further or consult a professional.
Common Causes of Faucet Leaks
While we’ve already touched on some of the common causes of faucet leaks, here’s a more detailed breakdown:
Worn-Out Washers
Washers are one of the most common culprits of faucet leaks. Over time, they can wear out or become misshapen, leading to leaks. Replacing them is usually a quick and easy fix.
Corroded Valve Seats
The valve seat is the part of the faucet that the washer seals against. If it becomes corroded or damaged, it can cause leaks. You may need to replace the valve seat if this is the issue.
Loose or Damaged O-Rings
O-rings are small rubber rings that create a seal between the faucet handle and the stem. If they’re loose or damaged, they can cause leaks. Replacing them is usually straightforward.
Mineral Deposits
Hard water can leave mineral deposits on faucet parts, preventing them from sealing properly. Regular cleaning can help prevent this issue.
Regular Maintenance Tips
Preventing leaks in the first place is always better than fixing them after the fact. Here are some maintenance tips to keep your bathtub faucet in tip-top shape:
- Regularly clean the faucet to remove mineral deposits.
- Check the washer and O-ring periodically and replace them as needed.
- Use a water softener if you have hard water.
- Inspect the faucet for signs of wear and tear.
By following these tips, you’ll be able to extend the lifespan of your faucet and avoid costly repairs down the line.
Cost Breakdown: DIY vs. Hiring a Plumber
Fixing a leaking bathtub faucet yourself can save you a ton of money. Here’s a cost breakdown to give you an idea:
DIY Costs:
- Replacement washers or O-rings: $2-$5
- Descaling solution: $5-$10
- Teflon tape: $2-$3
Hiring a Plumber:
- Hourly rate: $50-$100
- Parts: $20-$50
As you can see, doing it yourself can save you a significant amount of money. Plus, you’ll gain valuable skills that you can use for future repairs.
Preventing Future Leaks
Prevention is always better than cure. Here are some tips to prevent future leaks:
- Use a water filter to reduce mineral buildup.
- Regularly inspect and clean the faucet.
- Replace worn-out parts before they cause leaks.
- Consider upgrading to a more durable faucet if your current one is prone to leaks.
By taking these preventive measures, you’ll be able to enjoy a leak-free bathtub for years to come.
Troubleshooting Tips
Even with the best intentions, things can sometimes go wrong. Here are some troubleshooting tips to help you overcome common issues:
- If the leak persists after replacing the washer, check the valve seat for damage.
- If the O-ring doesn’t seem to be the issue, inspect the stem for corrosion.
- If mineral deposits are stubborn, try soaking the parts overnight in vinegar.
Don’t be afraid to experiment a bit. Sometimes, a little trial and error is all it takes to solve the problem.
Final Thoughts: Are You Ready to Fix That Drip?
Fixing a leaking bathtub faucet may seem daunting at first, but with the right tools and guidance, it’s a task that almost anyone can tackle. Not only will you save money by doing it yourself, but you’ll also gain a sense of accomplishment and valuable skills.
Remember, the key to success is patience and attention to detail. Take your time, follow the steps carefully, and don’t hesitate to seek help if you get stuck. And hey, if you ever need more tips or advice, feel free to drop a comment or share this article with your friends. Happy fixing!